Pricing a tiling job without a clear method ends up costing you. Either you underquote and eat the difference on materials, or you pad so heavily the customer goes elsewhere. Learning how to price a tiling job properly — from measuring square meterage through to adhesive, grout, trims, prep and labour — means your quotes are accurate, your margins hold, and you stop second-guessing yourself on every bathroom floor.
I've priced hundreds of tiling jobs over the years. The ones that went wrong were almost always down to the same things: not enough waste allowance, forgotten prep costs, or underestimating the time on awkward cuts. This guide covers every element so you can build a solid quote, line by line.
Measuring Up — Getting the Square Meterage Right
The starting point for any tiling price is accurate measurements. Always work in square metres.
For a floor: length × width = m². For a wall: height × width = m² per section. Walk every room and measure each section separately. A typical bathroom might include:
- Four separate wall sections, all different widths
- A floor area working around the WC pan and basin pedestal
- A shower area that may be priced separately if it needs tanking and a higher-grade tile specification
- Window reveals or recesses being tiled through
Add up every section. That's your gross tiled area.
Now deduct large openings. A doorway or window section where there genuinely are no tiles? Deduct it. But small items like sockets, switches, pipe holes and towel rail positions? Leave them in. The offcuts from those cuts are waste, not usable tile.
Measure twice and record everything. Mistakes in your measurements ripple through every material quantity that follows. If you're working from a floor plan rather than being on site, the guide to measuring a room from a floor plan covers the specific pitfalls to watch for when scaling from drawings.
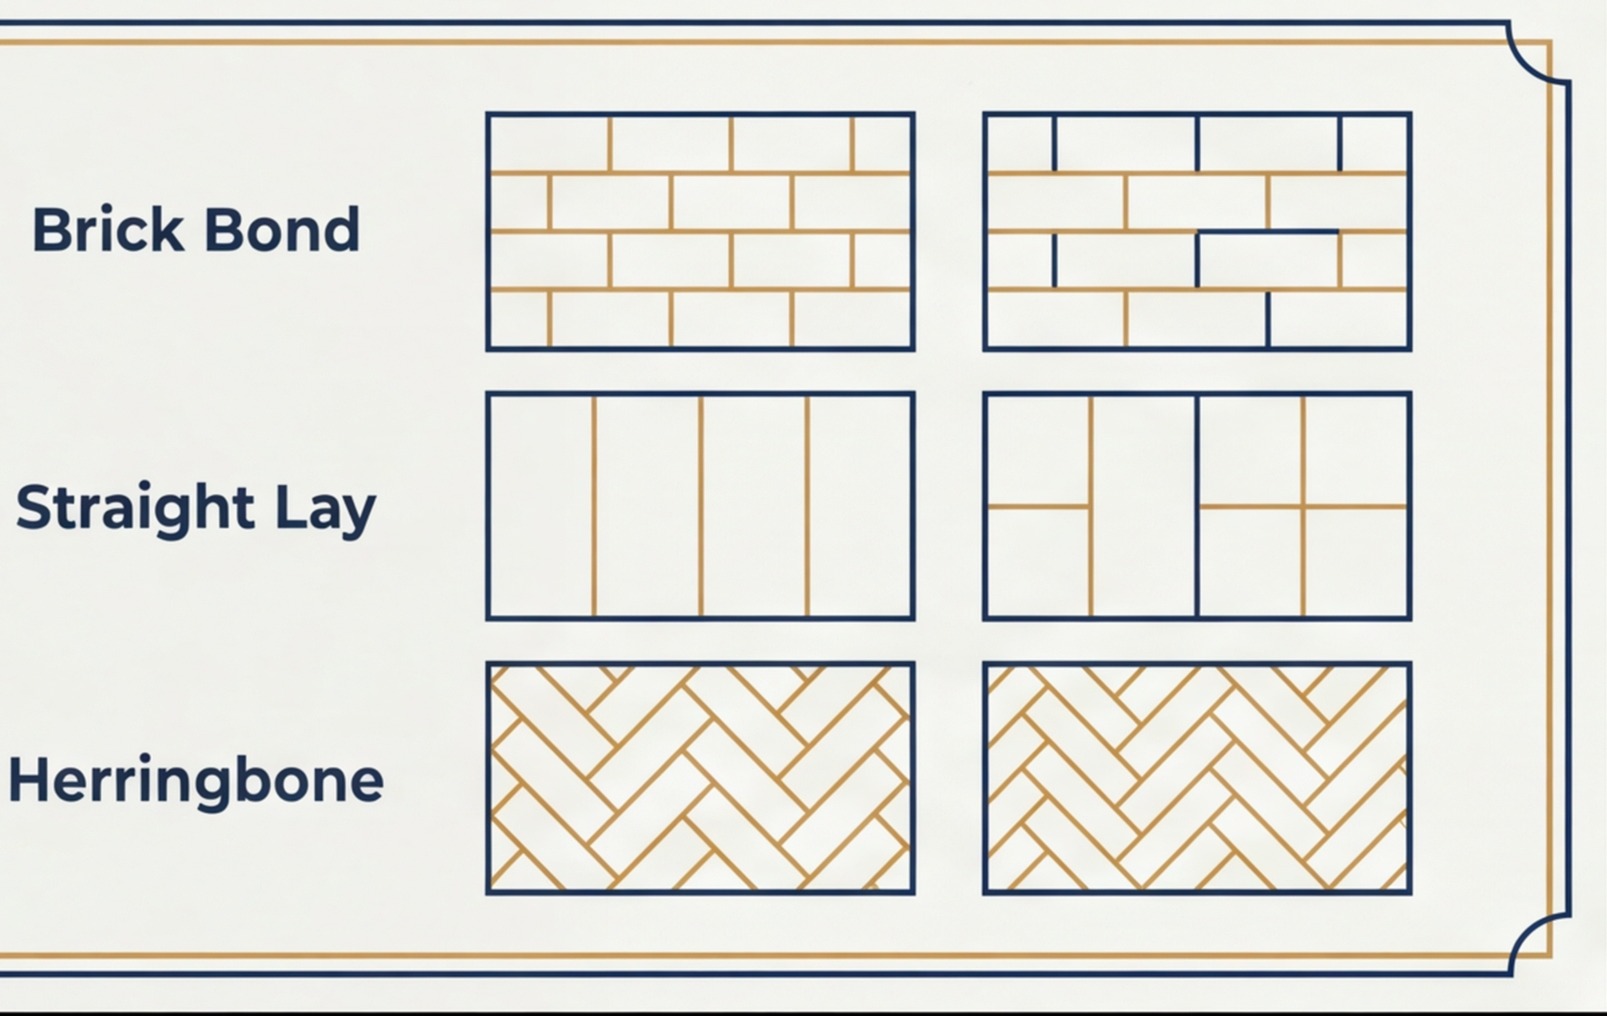
Pattern layouts and setting out
Your measured area stays the same regardless of pattern. But the pattern directly affects your waste allowance and your labour time. Diagonal and herringbone layouts require every tile at the edges and corners to be cut. Factor that into waste, not your measured m². For mosaic tiles on a mesh backing, measure the same way but allow more grout coverage and significantly more labour time.
Tile Waste — How Much to Allow
The rule of thumb is 10% waste on top of your measured area. For a simple rectangular room with a straight-bond layout, that covers it. But in the real world it's rarely that straightforward.
Here's what drives waste on a typical tiling job:
- Cutting around obstacles — WC pans, pedestal basins, shower trays and bath panels all generate off-cuts. There's no avoiding it.
- Small rooms — the smaller the room, the higher the waste percentage. A 2m × 2m bathroom floor might waste 20% just on perimeter cuts.
- Large format tiles — a 600×600mm tile cut to a 50mm sliver to fill a gap is 90% waste. One bad measurement on a £25-a-tile porcelain floor is an expensive mistake.
- Diagonal and pattern layouts — every piece at the perimeter is a 45-degree cut. Much higher waste than straight bond.
- Mismatched orders — going back to the merchant for a second batch that's a slightly different shade. Order enough the first time.
| Layout type | Waste allowance |
|---|---|
| Straight bond, large open room | 10% |
| Straight bond, small or awkward room | 15% |
| Diagonal or herringbone pattern | 20% |
| Complex feature wall or mosaic | 25% |
Always order with the waste allowance baked in. Don't order tight. Most tile ranges go out of stock and matching a batch weeks later is a nightmare. If you have off-cuts left at the end, the customer has spares for future repairs — that's a selling point, not a waste.
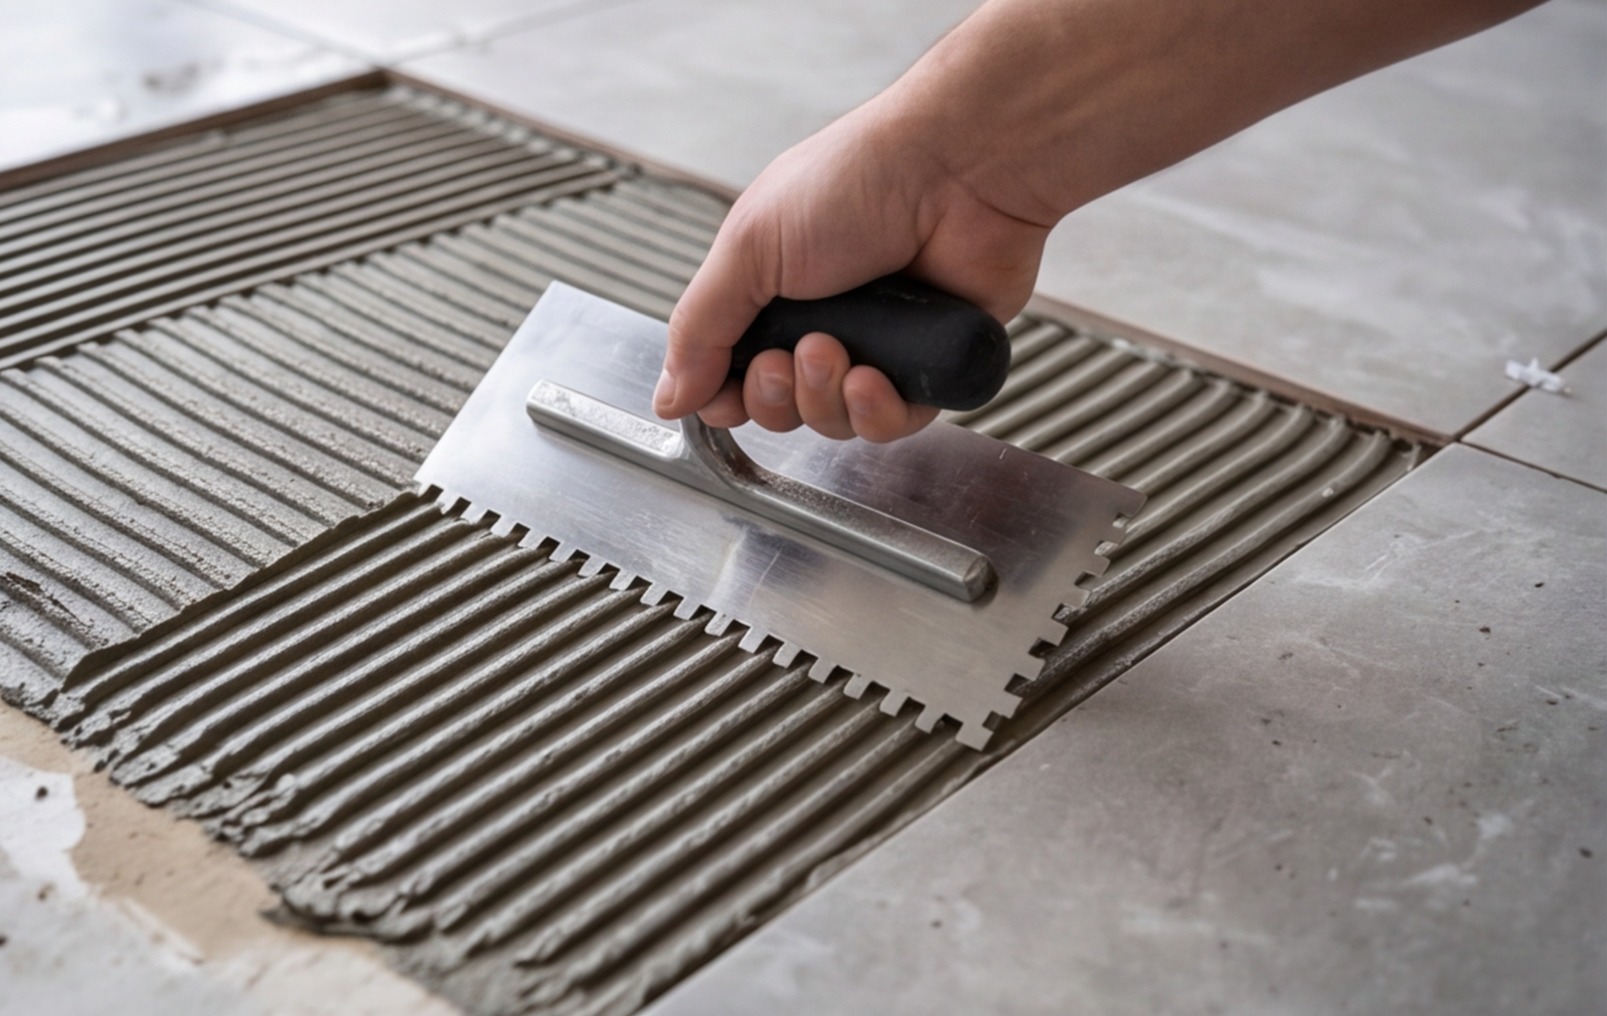
Adhesive Coverage and Quantities
Adhesive is a materials cost most builders underestimate. It's not dramatic on a small bathroom, but on a large kitchen floor or a whole-house tiling job it adds up fast.
Coverage varies based on:
- Type of adhesive — powder, ready-mixed or rapid-set
- Tile size and weight
- Substrate condition — smooth screed, uneven blockwork or plasterboard all behave differently
- Notched trowel size — bigger tiles need bigger notch trowels, which use more adhesive per m²
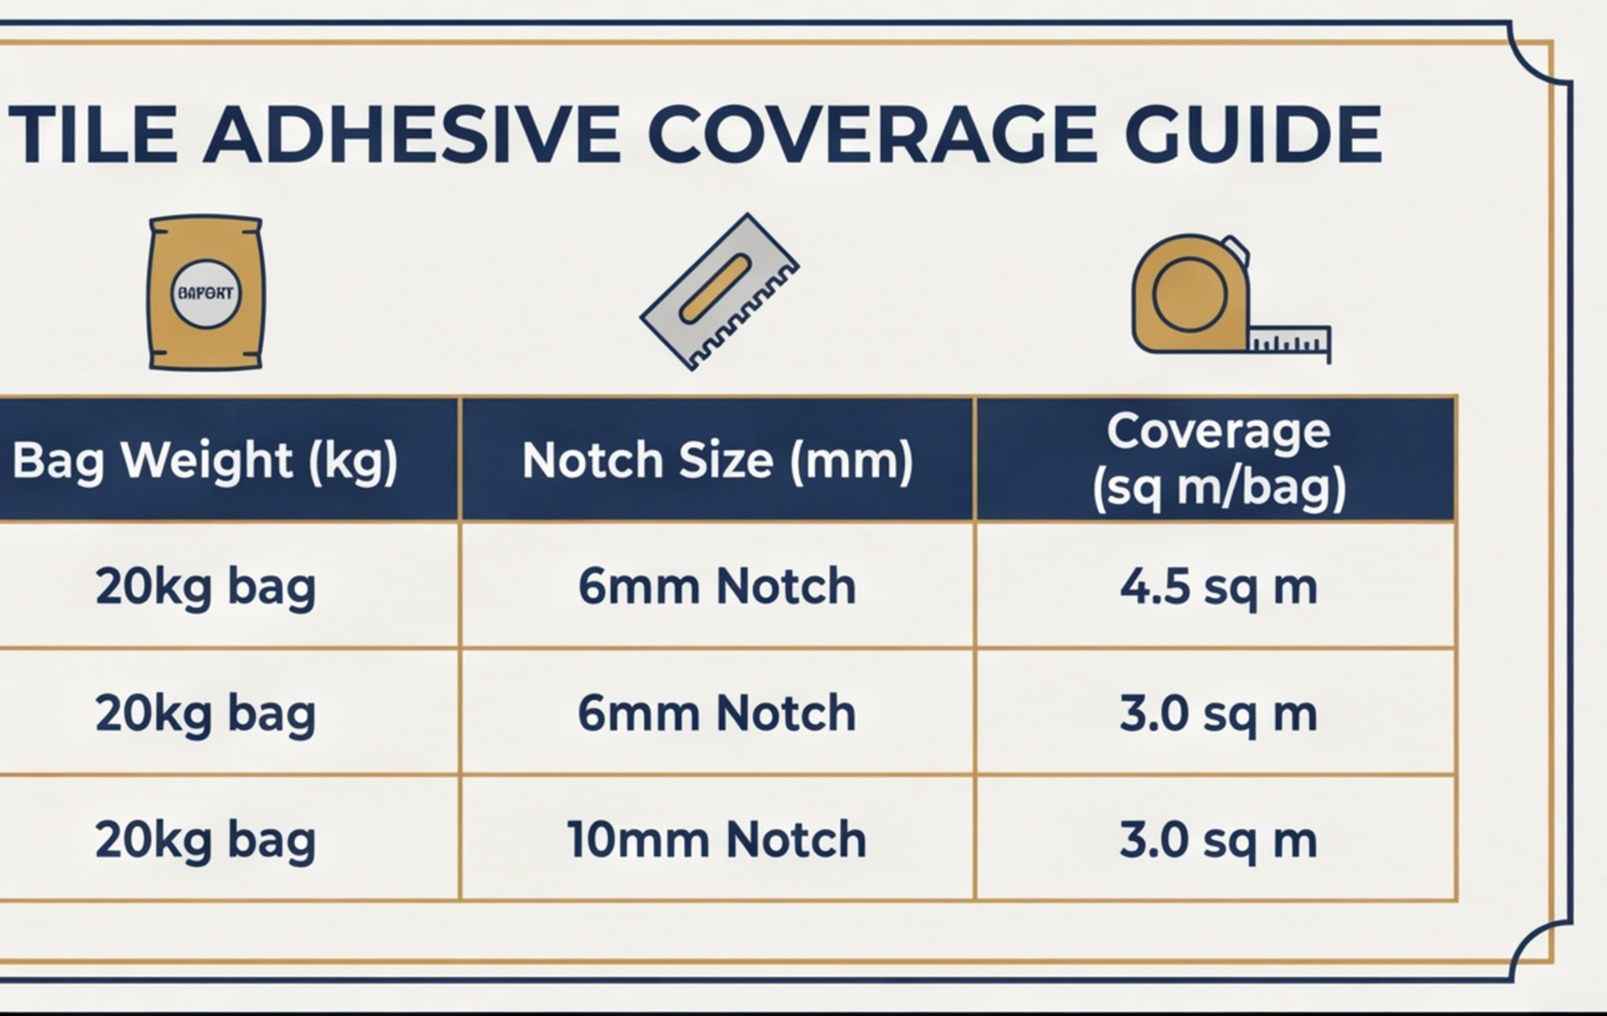
| Tile size | Trowel notch | Coverage per 25kg bag |
|---|---|---|
| Up to 300×300mm | 6mm | 7–8m² |
| 300–600mm | 10mm | 4–5m² |
| 600mm+ (large format) | 12mm+ | 3–4m² |
For large format tiles you also need to back-butter — applying adhesive to both the substrate and the back of the tile. That effectively doubles your adhesive consumption. Budget for it; it catches people out every time.
On an uneven substrate you may end up applying heavier beds to compensate. Always check substrate levels before quoting. If the floor is more than 3mm out, the correct solution is levelling compound first, not extra adhesive.
Ready-mixed adhesive is more expensive per m² than powder and covers less. It's fine for small splash areas or repairs. For a full bathroom or kitchen floor, powder is the sensible choice on cost.
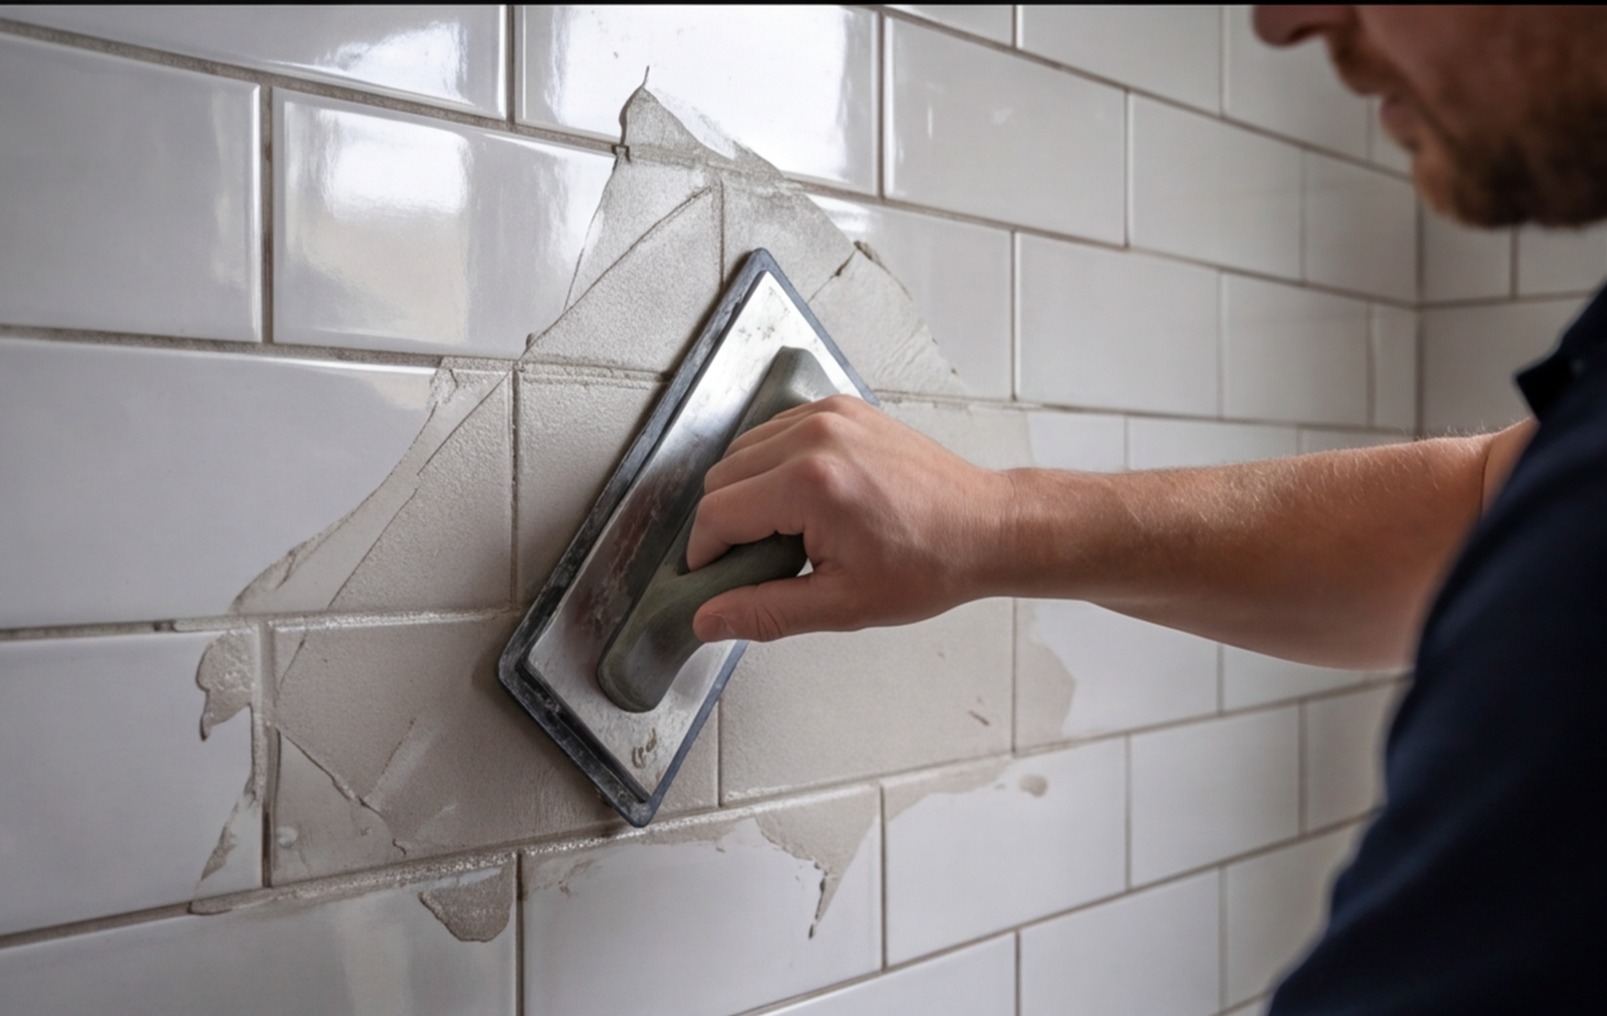
Grout, Silicone and Edge Trims
Grout coverage
Grout is cheaper than adhesive but still needs calculating properly. Coverage depends on tile size, joint width and tile thickness.
- Wall tiles at 2mm joints — 1kg of grout covers roughly 2–3m²
- Floor tiles at 3mm joints — 1kg covers roughly 1.5–2m²
- Epoxy grout — covers significantly less and costs three to four times more; only specify where genuinely required (food prep areas, pool surrounds)
If the substrate is porous — bare plasterboard, old painted walls, or an unprimed screed — you'll need tile primer before adhesive. It's cheap but costs time and material. Price it in.
Silicone sealant
Every internal corner where tiles meet needs silicone, not grout — bath/tile junction, shower tray/tile junction, corner between tiled walls. Grout in these joints will crack within months as the structure flexes. A 380ml cartridge covers roughly 7–8 linear metres at 6mm bead. Most bathrooms need two cartridges minimum.
Edge trims and accessories
These small items get forgotten on more quotes than I can count:
- Tile trim / Schluter strip — aluminium or stainless edge trim where tiles finish without a natural edge. Budget £3–£8 per linear metre depending on finish and width. A shower niche alone might need 2–3 metres.
- External corner trim — for exposed corners on feature walls, shower niches or any outside corner not covered by a return tile.
- Threshold strips — at every bathroom doorway where tiled floor meets carpet, timber or vinyl. Typically £5–£15 per strip.
- Tile spacers — crosses or T-spacers. Budget 1–2 bags per room. Cheap individually, consistently forgotten on quotes.
- Grout sealer — for porous natural stone, unglazed porcelain or external tiles. Applied on completion. Budget 30 minutes labour per room.
Surface Prep and Levelling — The Hidden Cost
Surface prep is the most underquoted part of a tiling job. Builders who skip it in their quotes either absorb the cost or leave the job in poor condition. Neither is acceptable.
Old tile removal
Removing existing tiles is labour-intensive and messy. A rough working guide is 1–1.5 hours per m², including breaking out tiles, bagging debris and making good the substrate. Add skip or builders bag hire costs as a separate line. On a 25m² bathroom this can easily add a full day's work before you've laid a single new tile.
Waterproofing wet areas
Any shower area must be tanked before tiling — a proprietary brush-applied membrane is the reliable, straightforward approach. A 1.5m × 1.5m shower enclosure will typically use one tanking kit at £80–£150 in materials, plus half a day for application and curing time before tiling begins. This is non-negotiable in a shower. Skipping it and relying on the tile adhesive as a waterproofing layer is how you end up back on site three months later fixing leak damage.
Levelling compound
If the floor is more than 3mm out of level, you need levelling compound before tiling. A 20kg bag covers around 8–10m² at 5mm depth. On a badly uneven floor, depth can be 10mm or more — doubling your material and adding to the drying time before tiles can go down. Always check floor levels on site before quoting. Never assume.
Cement board and rigid substrates
Over timber floors or where the existing substrate is flexing, cement board is the correct solution. Fix it, tape the joints, prime and allow to cure before tiling. Add the cost of board, fixings and tape, plus half a day's labour for a typical bathroom floor. If you're producing a proper bill of quantities, prep and demolition should always appear as distinct items with their own rates and quantities — never buried in the m² tiling rate.
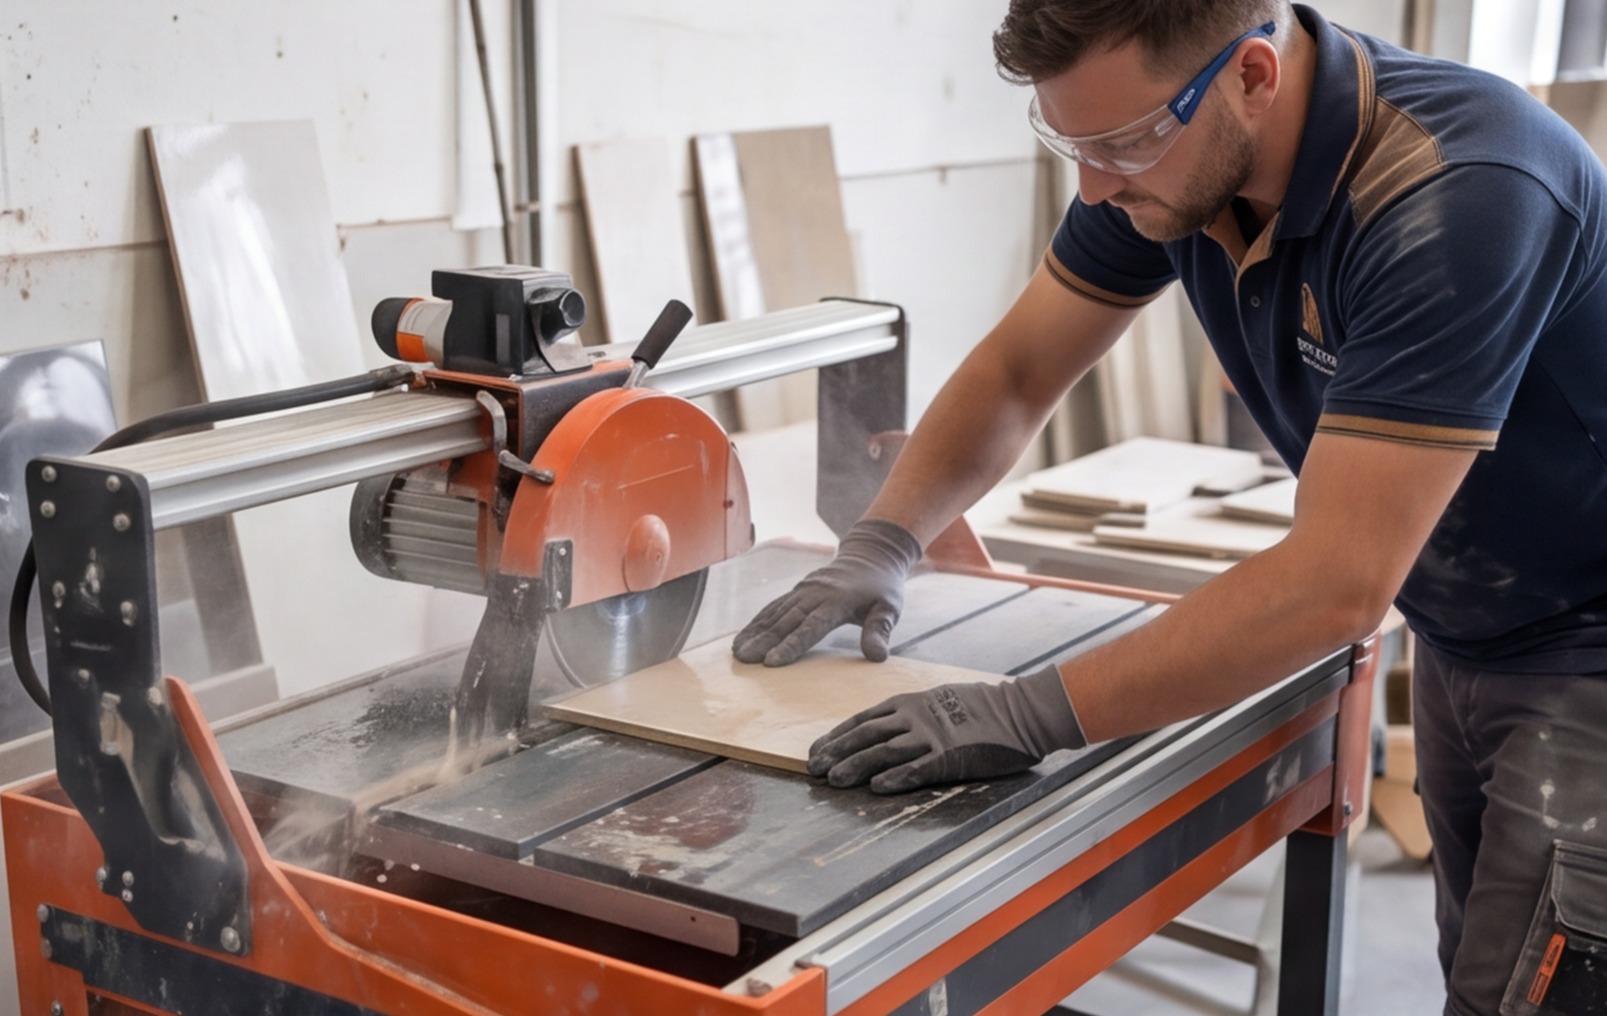
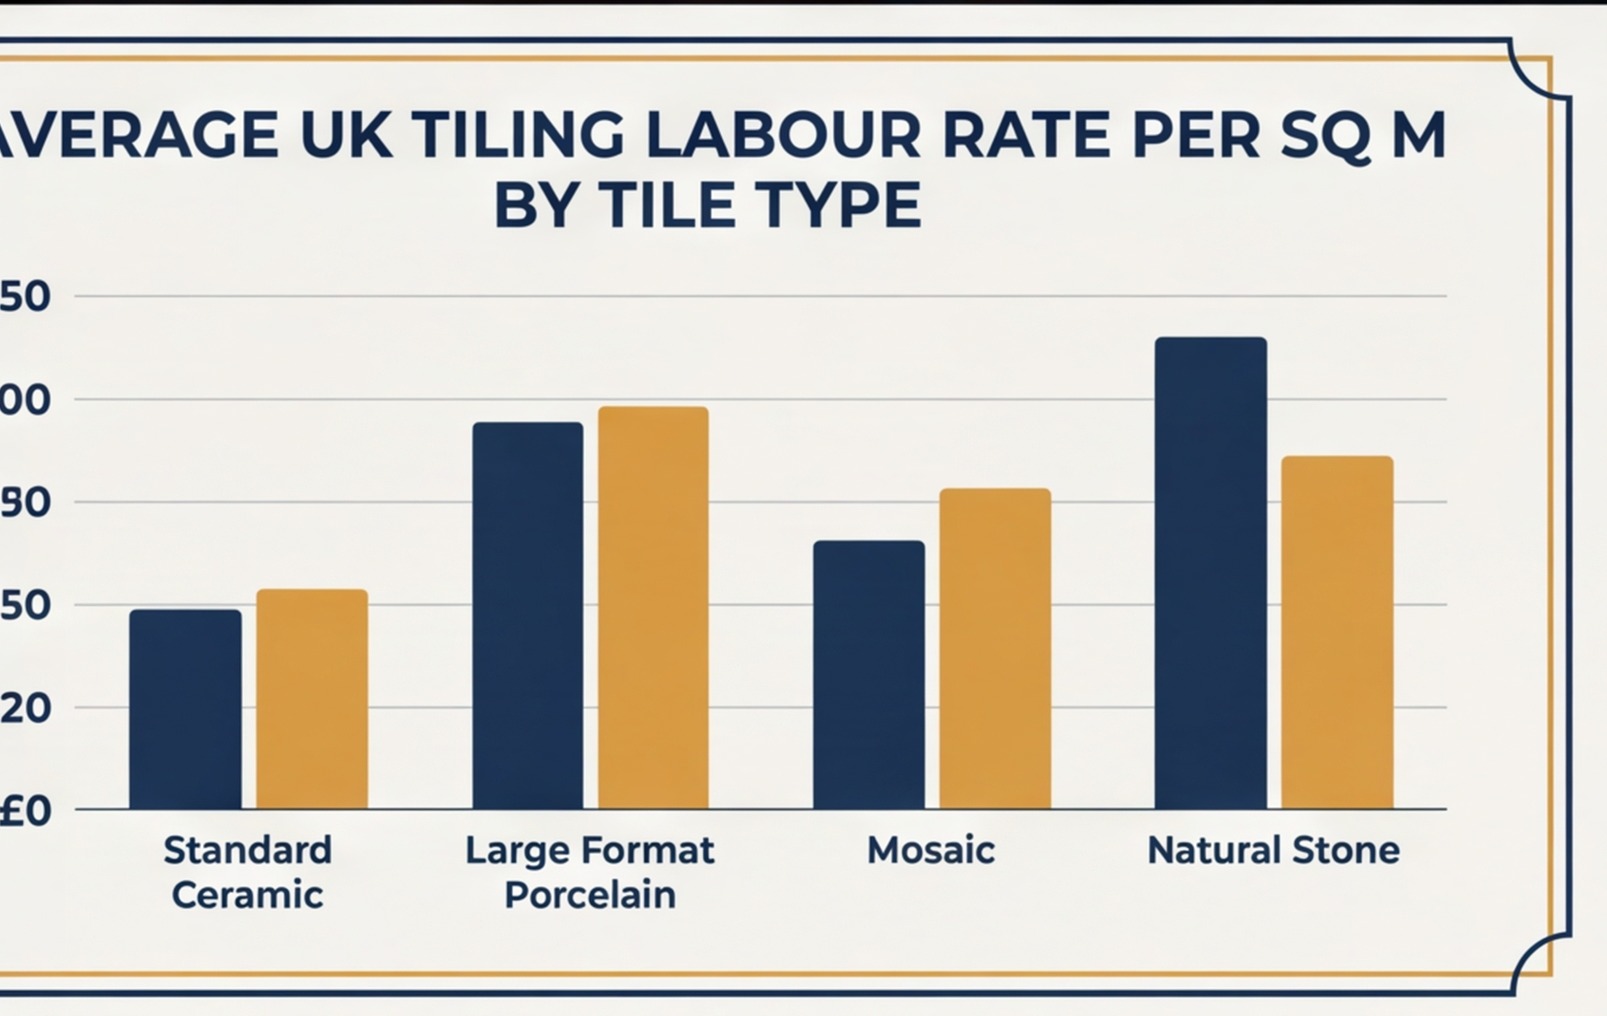
Labour Rates and Awkward Cuts
Tiling labour varies across the UK, but here are realistic current ranges:
| Job type | Labour rate per m² |
|---|---|
| Standard floor tiling — straight bond | £25–£40 |
| Standard wall tiling — straight bond | £20–£35 |
| Large format tiles (600mm+) | £40–£60 |
| Diagonal or herringbone pattern | £45–£65 |
| Mosaic tiles — manual work | £60–£90 |
| Feature wall — complex setting out | £50–£80 |
Where time really disappears
Straight-bond tiling in a rectangular room is one of the faster trades once you're set up. But any of the following add significant time to a job:
- Diagonal layout — every piece at the perimeter is a 45-degree cut. Setting out takes longer and you're cutting nearly every tile at the edges. Add at least 30–50% to your tiling time.
- Shower niches and recesses — inside corners, outside corners, shelf surfaces and trim all need careful work. A shower niche is easily an hour of focused work minimum.
- Around radiators, pipes and WCs — template cuts around pipes and radiator tails need accuracy. A misplaced hole through a £30 porcelain tile is an expensive mistake.
- Feature walls with book-matching — where tiles are book-matched or have a strong vein pattern, setting out to achieve the visual effect takes time. Price it as a premium item.
Sanity-checking against day rate
The m² rate is useful for quoting. But also check your figure against a day rate. If a bathroom takes two days and your m² figure implies only one, something's off. A skilled tiler in the UK earns £200–£320 per day depending on region and experience. Use both calculations to cross-check your labour figure before the quote goes out.
Putting It All Together — Sample Tiling Quote
Here's a worked example for a standard bathroom — full-height wall tiling, floor tiling, no existing tiles to remove, straight-bond layout throughout.
Measured areas: floor 4.5m², walls (full height including around WC, basin and bath) 22m²
| Item | Quantity | Unit rate | Total |
|---|---|---|---|
| Floor tiles — 600×600 porcelain | 4.5m² + 15% = 5.2m² | £28/m² | £146 |
| Wall tiles — 300×600 ceramic | 22m² + 12% = 24.6m² | £18/m² | £443 |
| Floor adhesive — powder, 10mm notch | 5.2 ÷ 4.5 = 1.2 → 2 bags | £18/bag | £36 |
| Wall adhesive — powder, 6mm notch | 24.6 ÷ 7.5 = 3.3 → 4 bags | £14/bag | £56 |
| Floor grout | 3kg | £5/kg | £15 |
| Wall grout | 10kg | £5/kg | £50 |
| Silicone sealant | 2 cartridges | £8 each | £16 |
| Edge trim | 3 linear metres | £5/m | £15 |
| Waterproofing membrane (shower area) | 1 kit | £110 | £110 |
| Sundries — spacers, primer, mixing buckets | — | — | £30 |
| Materials total | £917 | ||
| Item | Area / time | Rate | Total |
|---|---|---|---|
| Floor tiling — straight bond | 4.5m² | £35/m² | £158 |
| Wall tiling — straight bond | 22m² | £30/m² | £660 |
| Prep, waterproofing, silicone and clean-up | 1 day | Day rate | £220 |
| Labour total | £1,038 | ||
| Line | Amount |
|---|---|
| Materials | £917 |
| Labour | £1,038 |
| Net total (before margin) | £1,955 |
Add your margin on materials — most builders apply 15–20% on supply — and your end quote to the customer typically lands in the £2,200–£2,500 range depending on your overhead structure and region.
If tiling is part of a wider bathroom fit-out, have a look at how the full bathroom renovation quote comes together — tiling sequences with plumbing, joinery and first-fix electrics in ways that affect your programme and your pricing.
Once you've got the method right, pricing a tiling job stops feeling like guesswork. Measure accurately, allow realistic waste, calculate every material line separately and never bury prep in your m² rate. The builders who consistently make money on tiling work treat it as a science, not a rough estimate.
If you're quoting tiling as part of a larger renovation, try RenoCalc to generate material schedules and cost estimates from your floor plan in under 3 minutes. For a broader look at construction estimating software options for UK builders, that guide compares the main tools on the market.
Frequently Asked Questions
- How much does a tiler charge per m² in the UK?
-
UK tiling labour rates typically range from £20–£40 per m² for standard straight-bond wall and floor work. Large format tiles (600mm+) command £40–£60/m² because they require bigger notch trowels, full back-buttering and more precise setting out. Diagonal and herringbone patterns add 30–50% to labour time, pushing rates to £45–£65/m². These are supply-only labour rates — if you're supplying the tiles as well, your quote combines materials and labour on top. Always cross-check your m² rate against a day rate before the quote goes out.
- How much tile adhesive do I need for a bathroom?
-
Coverage depends on tile size and trowel notch. For standard wall tiles up to 300×300mm with a 6mm notch, a 25kg bag covers roughly 7–8m². For floor tiles up to 600mm with a 10mm notch, expect 4–5m² per bag. Large format tiles with a 12mm+ notch and full back-buttering drop to 3–4m² per bag. For a typical bathroom with 4.5m² floor and 22m² walls, budget around 6 bags in total. Always check the manufacturer's data sheet and allow for substrate variation.
- What waste percentage should I allow for tiles?
-
For a simple rectangular room with a straight-bond layout, 10% is the standard minimum. In practice, small rooms, large format tiles and pattern layouts always need more. Allow 15% for small or awkward rooms, 20% for diagonal or herringbone patterns, and 25% for complex feature walls or mosaics. It's always better to order slightly more than needed — running short and needing a second delivery from a different production batch risks a shade difference that won't match your existing tiles.
- How long does it take to tile a standard bathroom?
-
A standard bathroom with around 22m² of walls and 4.5m² of floor, all in straight-bond ceramic and porcelain, typically takes two to three days for a skilled tiler. That includes setting out, laying, grouting and silicone. Add a full day for surface prep — PVA, waterproofing membrane in the shower area, levelling compound if needed — and another day if old tiles need removing. Complex patterns, large format tiles or significant feature cuts add time on top of this baseline.