Knowing how to measure a room from a floor plan accurately is one of the most useful skills in the building trade. Whether you're pricing a job before a site visit, producing a take-off from architect's drawings, or trying to estimate materials from a Rightmove floor plan a client has sent over, the ability to extract reliable measurements from a drawing saves time, prevents errors and stops you underquoting from bad numbers.
This guide covers how floor plan scale works, how to read dimensions correctly, how to calculate floor areas and perimeters, and — just as importantly — the mistakes that make manual take-offs go wrong.
Understanding Floor Plan Scale
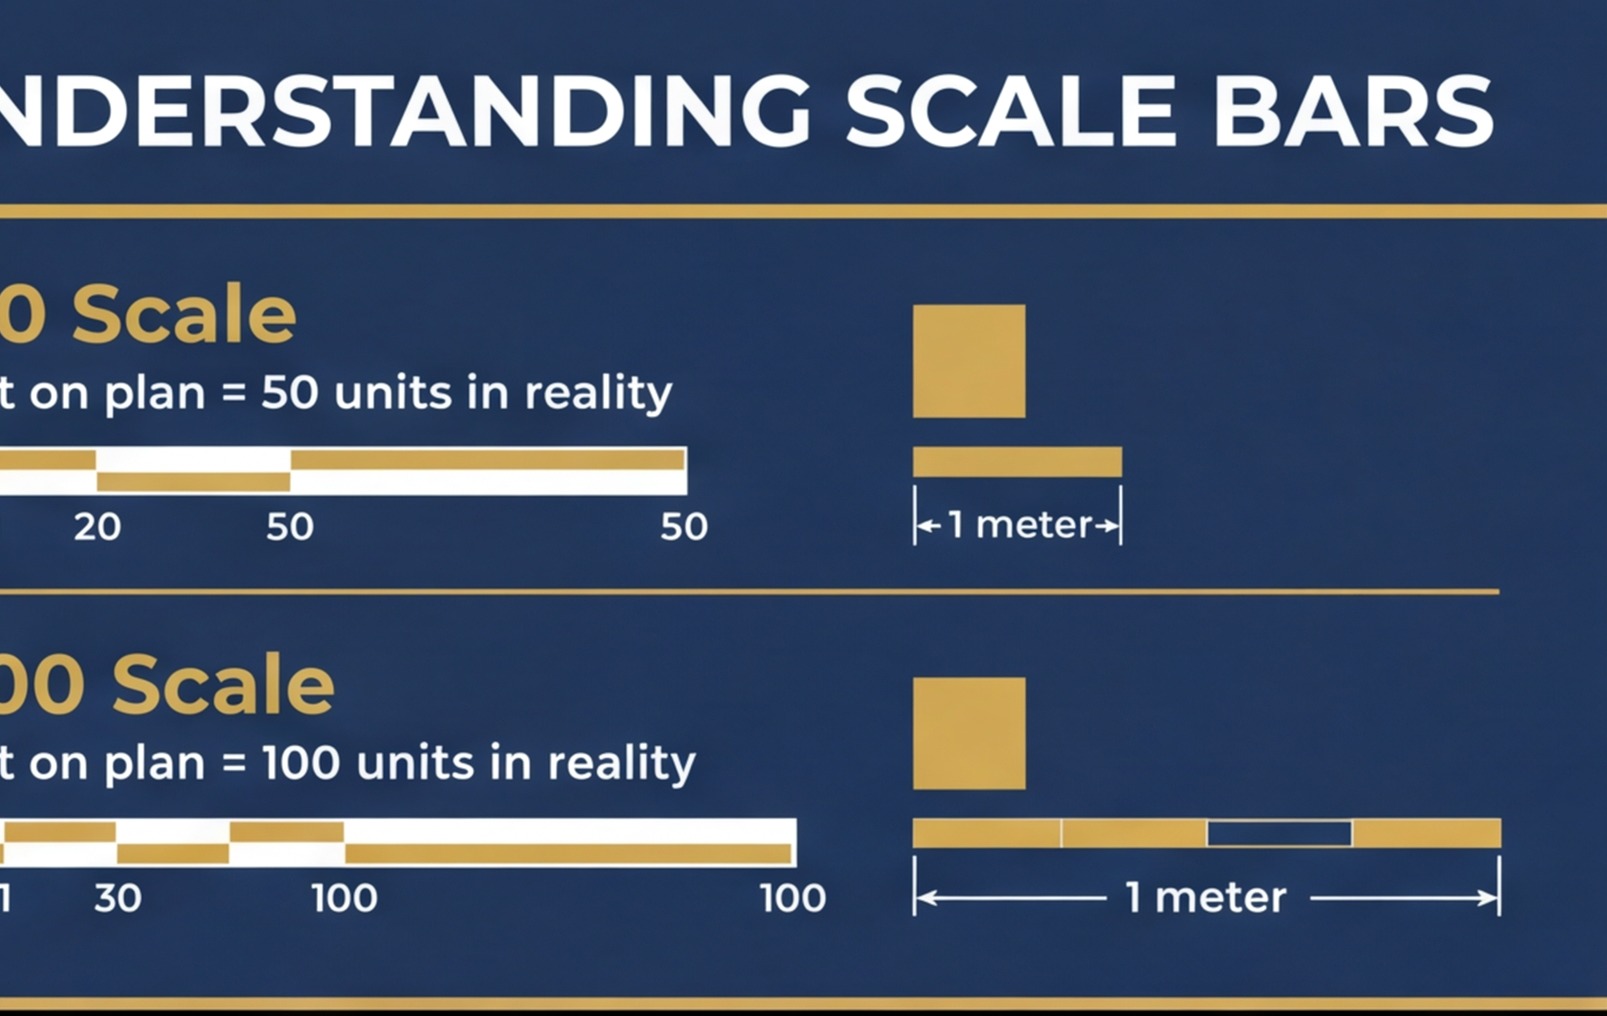
A floor plan is a drawing of a building produced at a reduced scale. The scale tells you the ratio between the drawn size and the real size. The most common scales used in UK domestic architectural drawings are:
- 1:50 — 1mm on the drawing = 50mm in real life (2cm on drawing = 1m real)
- 1:100 — 1mm on the drawing = 100mm in real life (1cm on drawing = 1m real)
- 1:200 — used for site plans and very large buildings. Rarely for room-level detail.
The scale is stated in the title block, usually at the bottom right of the drawing. Look for "Scale 1:50" or "Drawing not to scale" — the latter means you cannot scale from it at all and must rely entirely on annotated dimensions.
The scale bar
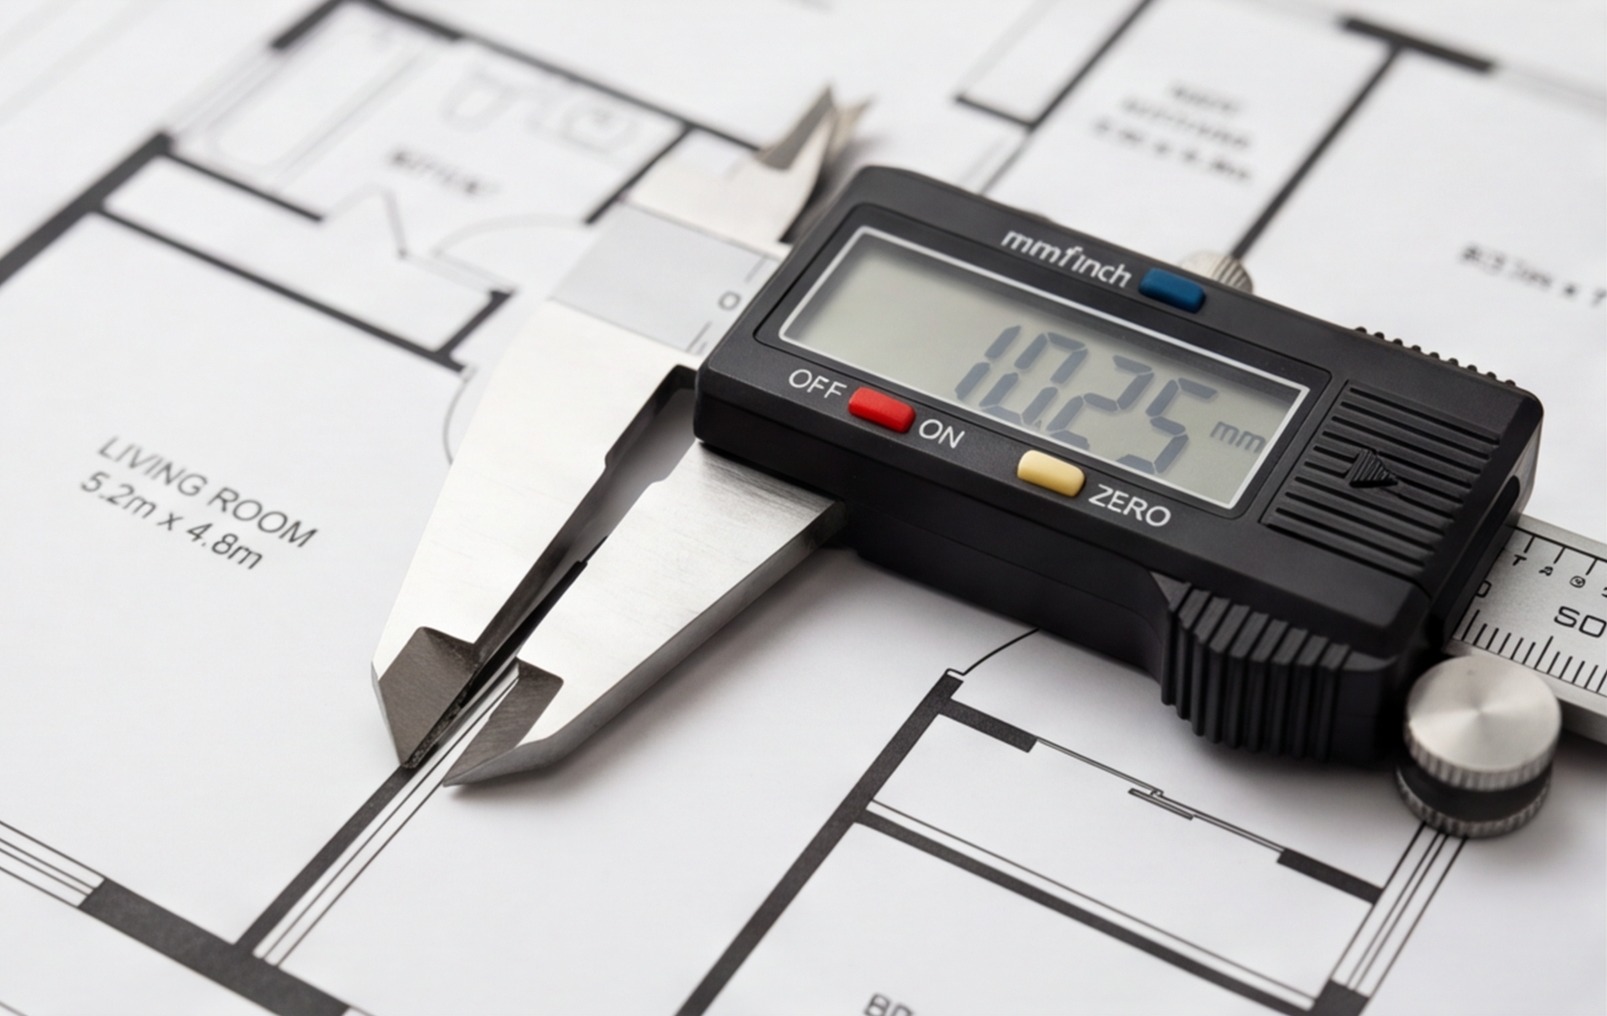
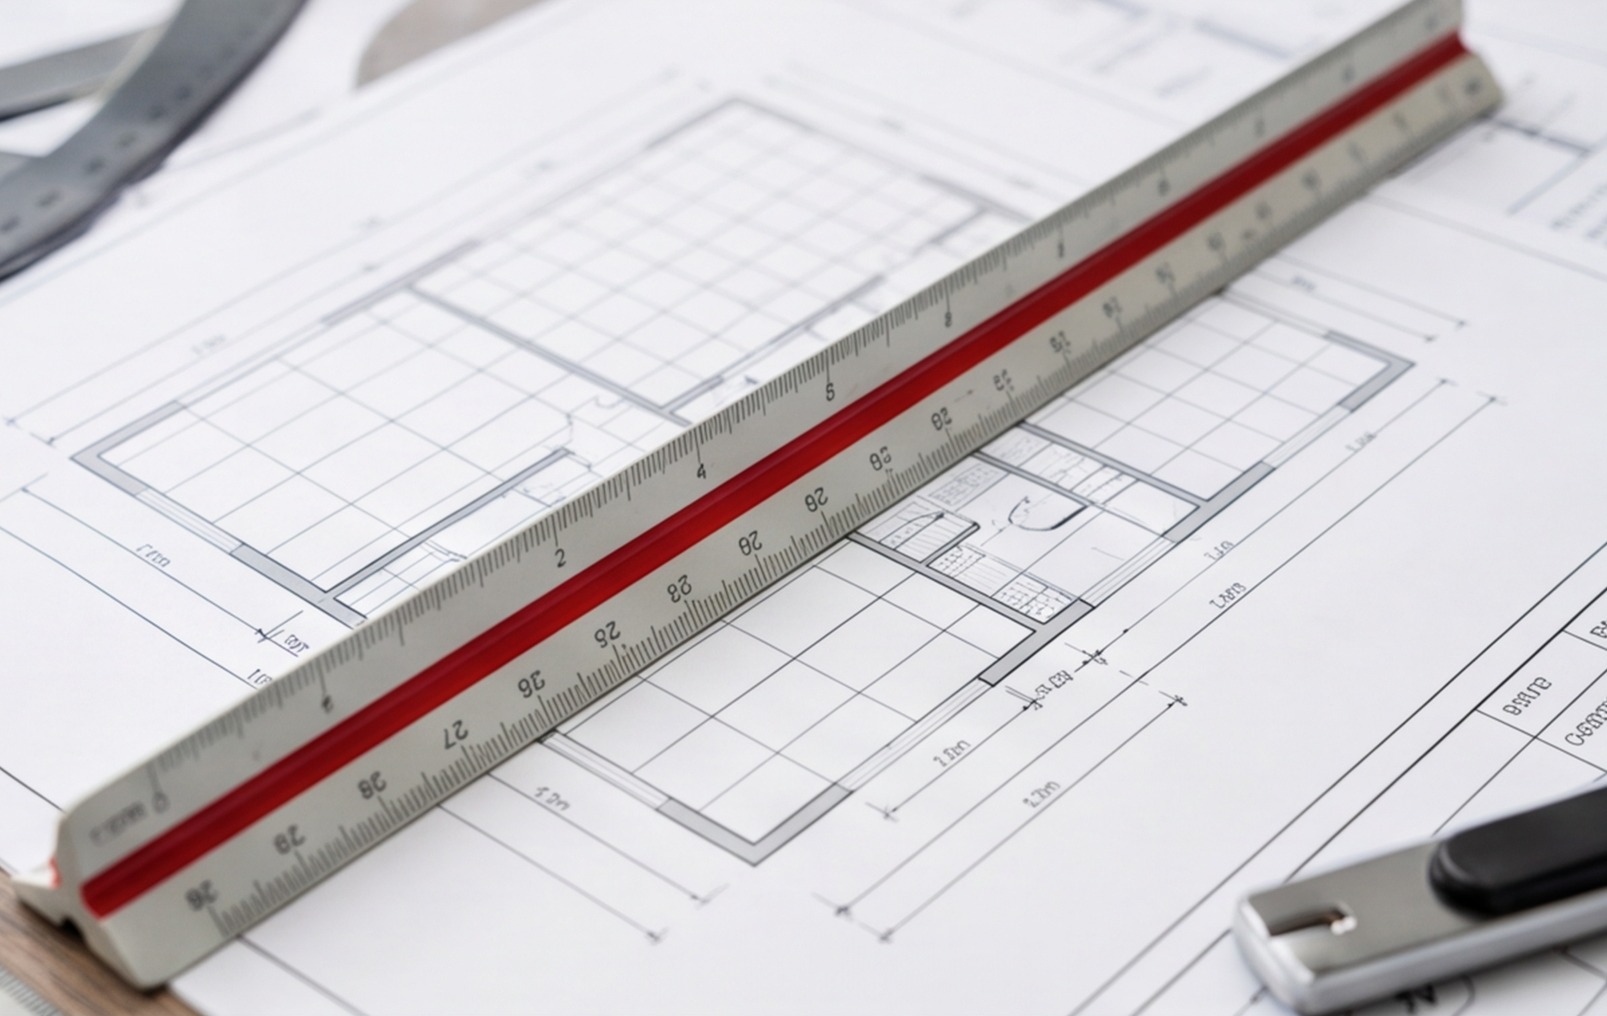
Most properly drawn architectural plans include a scale bar — a printed ruler showing what a specific physical length looks like at the drawing's scale. Always use the scale bar when scaling from a drawing, especially if you're working from a PDF or photocopy that may have been printed at a different size from the original.
A plan described as 1:50 that's been printed on A3 instead of A1 is not at 1:50. If you scale from it assuming 1:50, every measurement will be wrong. Use the scale bar to verify the drawing's scale before you measure anything.
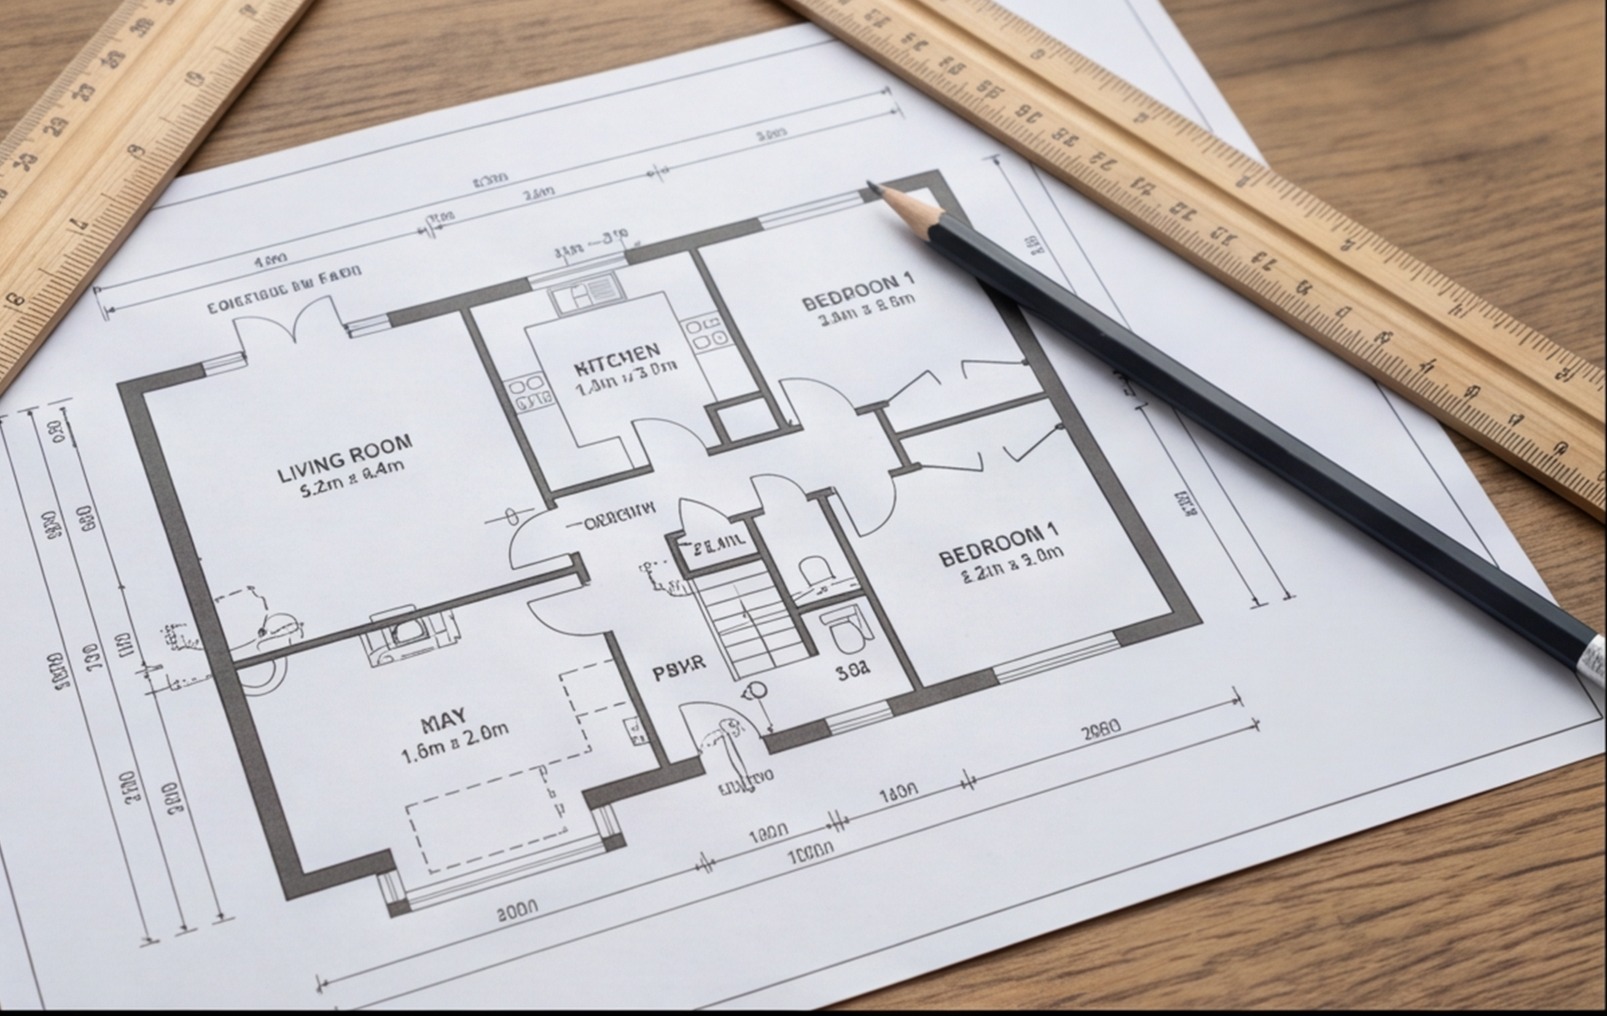
Reading Dimensions from a Floor Plan
Architectural drawings carry annotated dimensions — numbers written directly onto the drawing to state the actual size of an element. These are more reliable than scaling from the drawing because they tell you what the designer intended, regardless of whether the print is at the correct scale.
Types of dimensions on a floor plan
- Overall dimensions — the total external width or depth of the building or floor area
- Room dimensions — the clear internal size of each room, usually given as width × depth in the room annotation
- Opening dimensions — door and window widths and heights
- Setting-out dimensions — distances to structural elements, offsets and centres
For materials take-off — tiling, flooring, skirting, paint — you want internal dimensions. The external dimensions of a building include the wall thickness on both sides, which is irrelevant to the size of the floor or the length of the skirting.
A standard 100mm internal stud partition that's been plastered on both sides has a finished face width of around 125mm. A solid brick external wall can be 280–350mm thick. Always use the dimension to the finished wall face, not the external dimension, for internal material calculations.
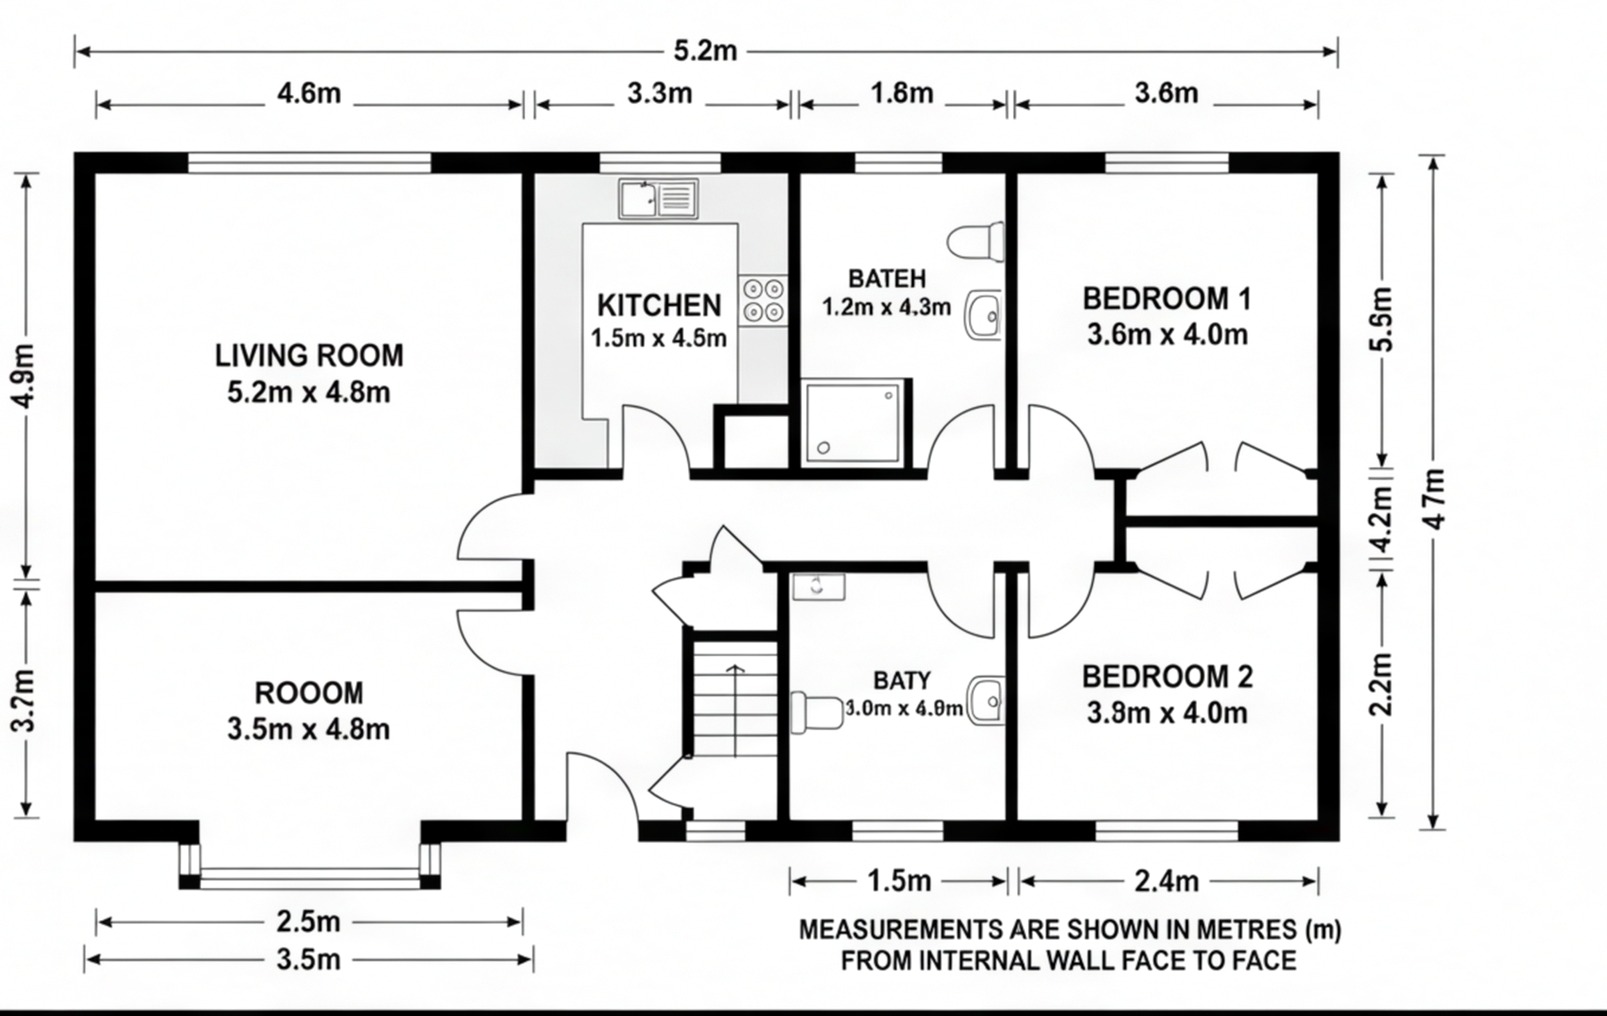
Calculating Room Area from a Floor Plan
Once you have the room dimensions, calculating floor area is straightforward for simple shapes. For more complex rooms it takes a little more work.
Simple rectangular room
Area = length × width
A room shown as 4.2m × 3.6m = 15.12m². Round sensibly — 15.1m² is accurate enough for most material calculations.
L-shaped room
Divide into two rectangles, calculate each separately, then add:
- Rectangle A: 4.2m × 2.4m = 10.08m²
- Rectangle B: 2.0m × 1.8m = 3.60m²
- Total: 13.68m²
Always check you haven't double-counted the corner junction. Draw the dividing line clearly and measure each rectangle to the line, not to the same point twice.
Rooms with bay windows
A bay window adds floor area. For a rectangular bay: measure the bay width and depth separately and add to the main room area. For an angled bay, calculate each panel as a rectangle (using the projection depth) and add. These areas matter for flooring and underfloor heating design — don't miss them.
Open-plan areas
An open-plan kitchen/diner shown as one space on the floor plan is measured as one area. If the client later wants to price the kitchen and living sections separately for different flooring, you need to agree a dividing line and measure each zone. Do this consistently — once the floor is down, the quantities are fixed.

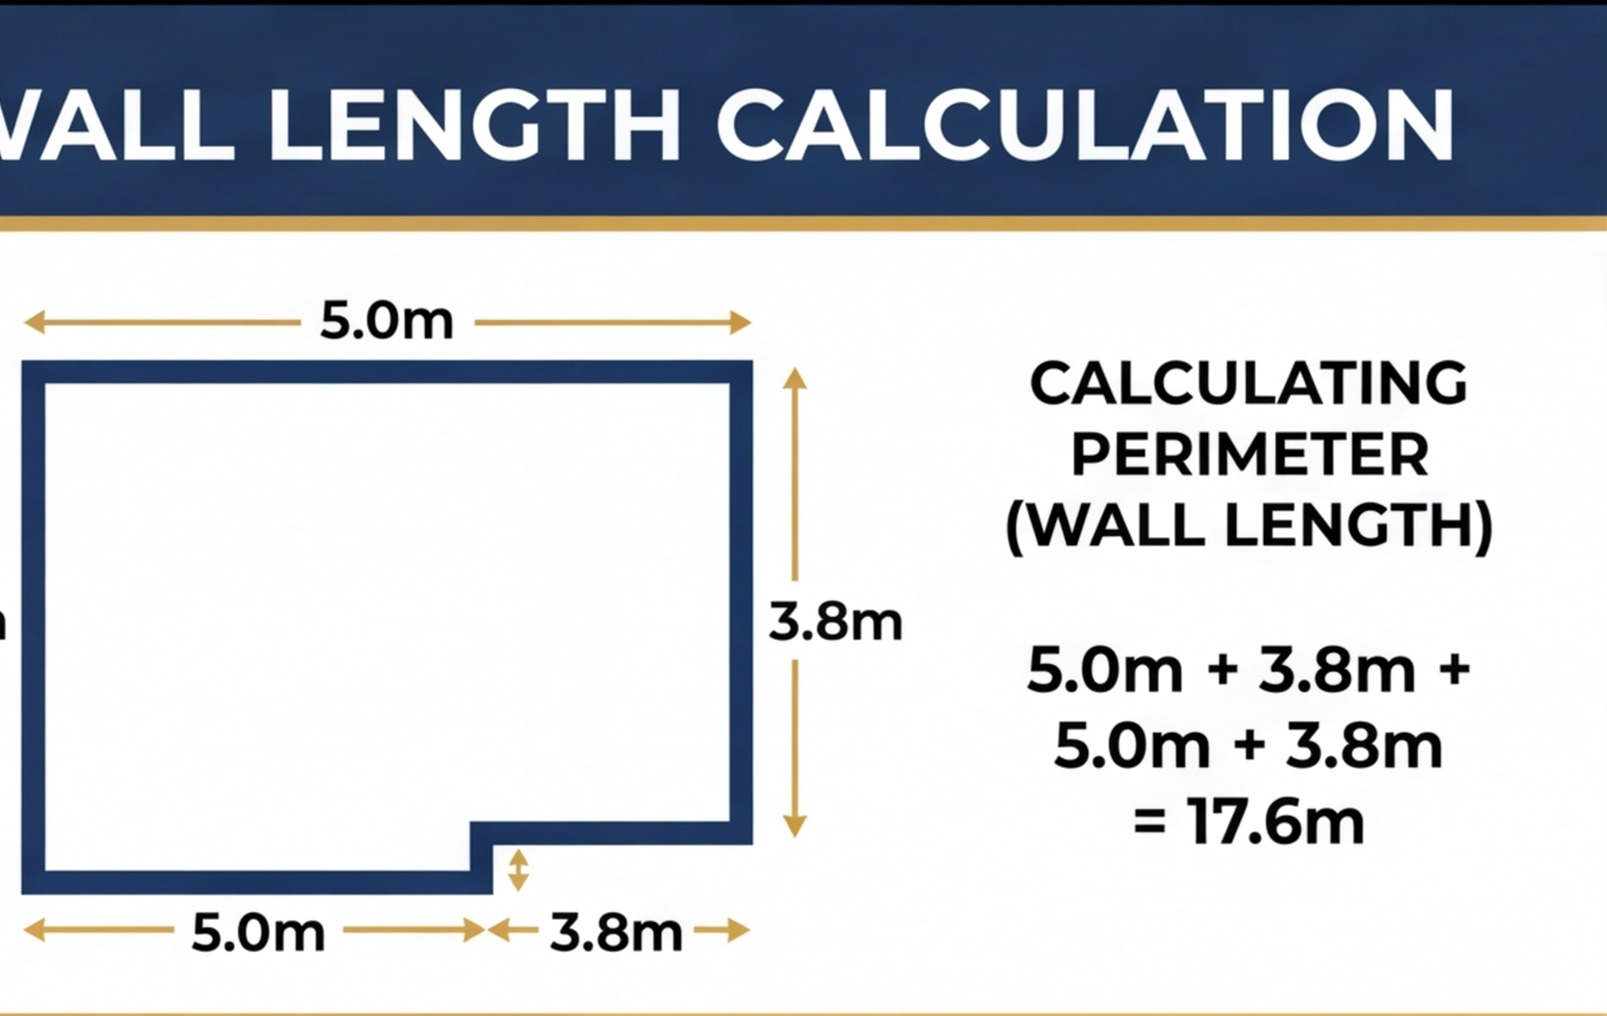
Measuring Perimeters and Openings
Floor area gives you quantities for flooring and tiling. But for skirting boards, wall tiling, plastering and decoration, you need the perimeter and wall areas.
Calculating perimeter for skirting
Perimeter = sum of all wall lengths. For a rectangular room: (length + width) × 2.
From this, deduct every door opening. The opening width is the clear span at the lining reveal — typically 762mm, 826mm or 838mm for standard single doors. Don't deduct window openings for skirting — skirting runs under windows, not around them.
Calculating wall area for tiling and plastering
Wall area = wall length × ceiling height, measured for each wall section separately.
Deduct large openings: doors and windows. A standard single door opening is roughly 2.04m × 0.838m = 1.71m². A typical window opening is roughly 1.2m × 1.0m = 1.2m². For small items like sockets, light switches and pipe holes, don't deduct — the off-cuts are waste, not useful material.
This is precisely the kind of take-off that drives the calculations behind a proper bill of quantities — each wall, each deduction, each unit of material measured and recorded.
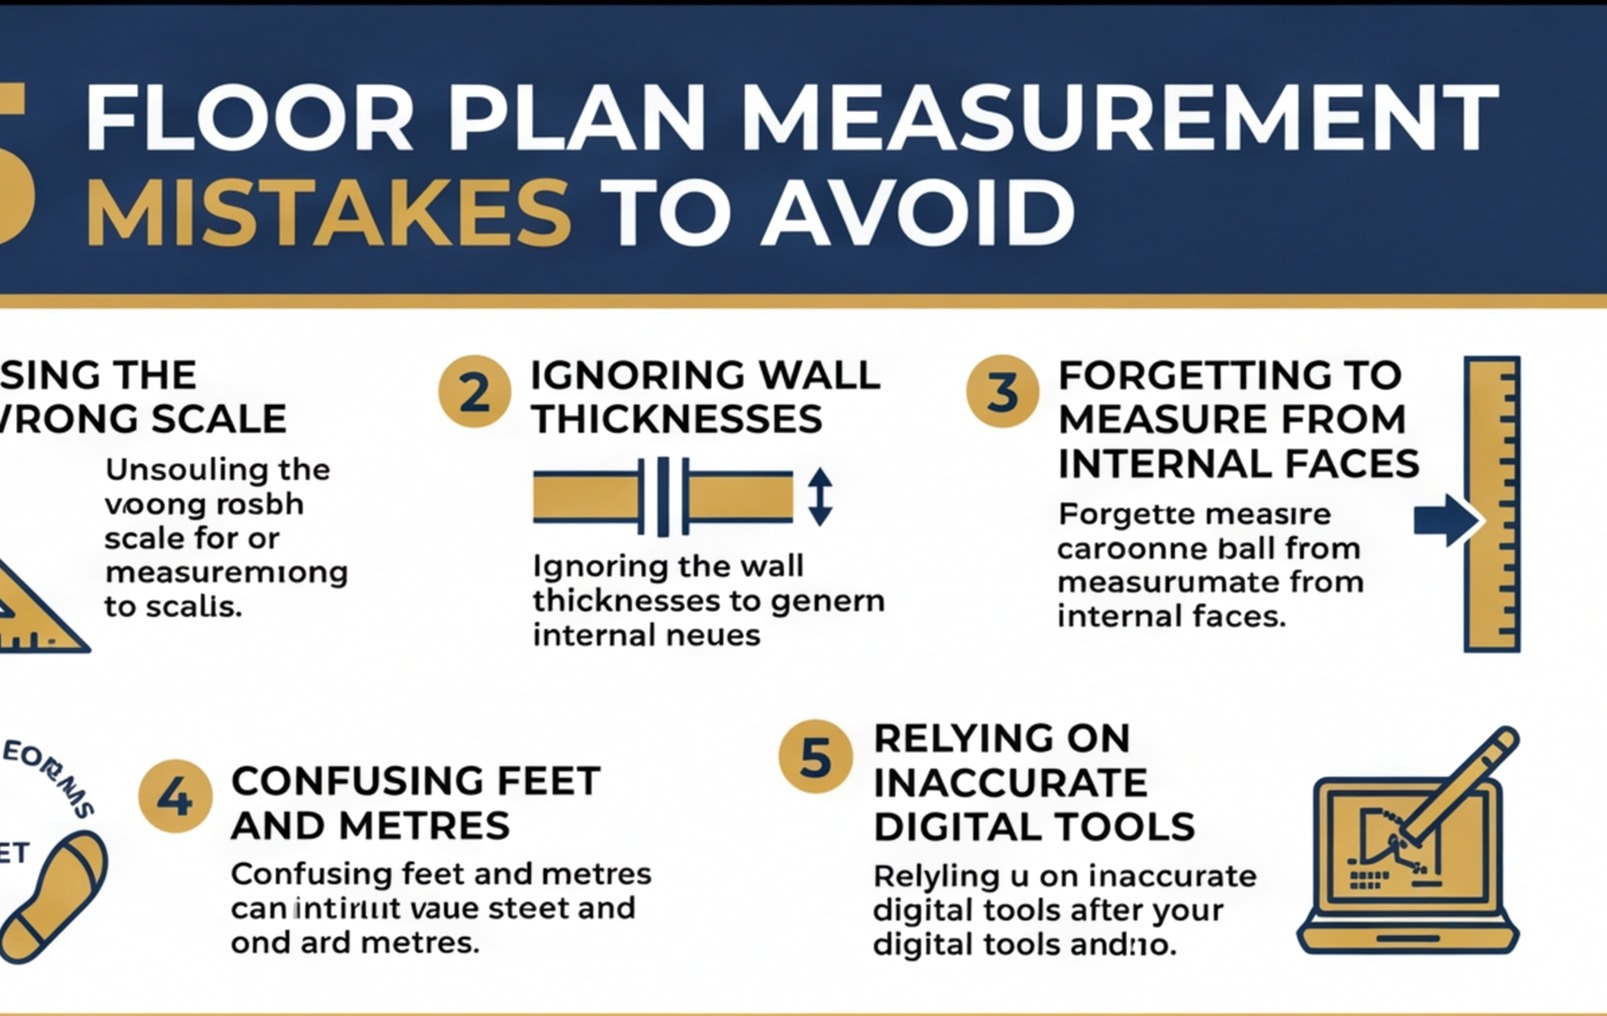
Common Mistakes in Manual Take-Off
Most errors in floor plan measurement come from one of these sources:
Scaling from a drawing that isn't at the stated scale
This is the most common mistake. A PDF floor plan printed on the wrong paper size, or a plan emailed as a JPEG and printed to fill the page, will be at an unknown scale. Always use annotated dimensions where they're provided. If they're not, use the scale bar to verify the printed scale before you measure.
Confusing external and internal dimensions
On a plan drawn at 1:100, the overall building footprint includes the external walls. If you measure the external dimension and use it as the room size, you're including up to 350mm of brick, block, cavity, insulation and plaster that's not floor area. The error compounds across a whole building survey. Always find and use the internal clear dimension.
Not deducting openings for perimeter items
Skirting board doesn't run across door openings. Plaster doesn't cover window frames. If you measure perimeter without deducting openings, you overorder material. Not dramatically on a single room, but across a whole house it adds up to wasted spend.
Forgetting walls between rooms
An estate agent floor plan that gives room dimensions as width × depth is not giving you the footprint of the building. The wall thickness between rooms is not counted in either room. The sum of all the individual room areas will always be less than the gross floor area — and the difference is the wall material. This matters when you're estimating structural quantities.
Reading the wrong floor
Multi-storey drawings have a plan for each floor. If you're measuring first-floor bedrooms and accidentally use the ground floor plan, the dimensions may be similar but the layout will be different. Check which floor plan you're on every time you start a new sheet.
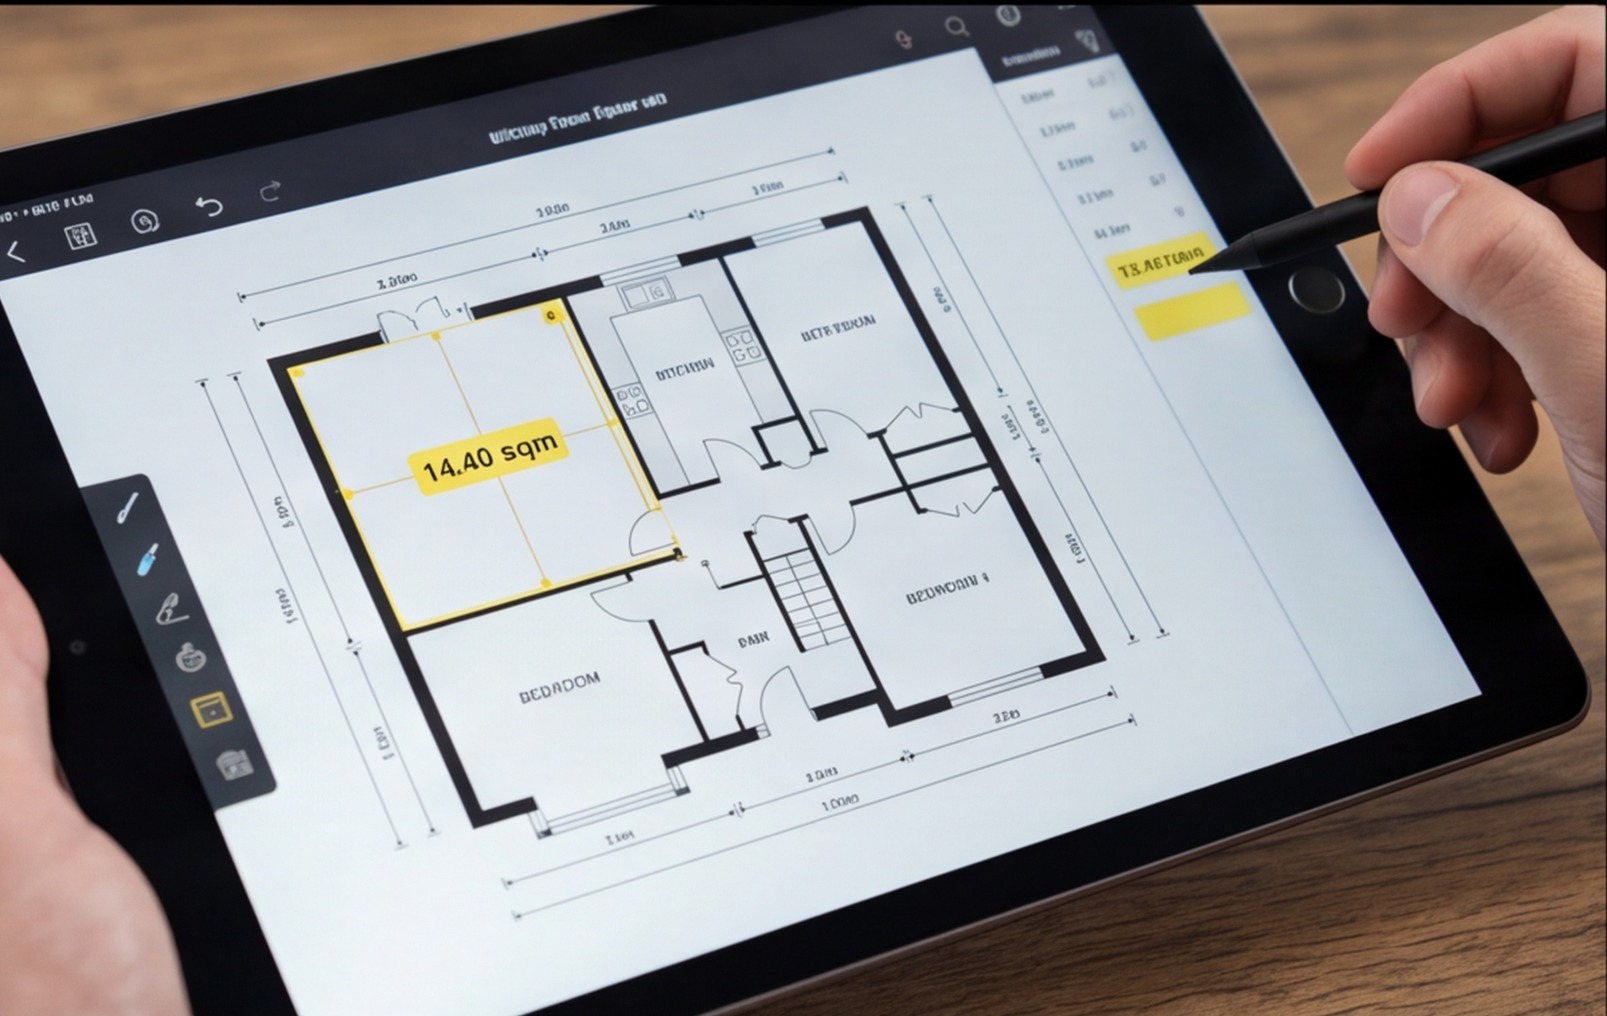
Digital Tools vs Manual Measurement
Manual scaling with a rule and calculator works. But for anything more than a handful of rooms, digital tools are faster and reduce transcription errors.
PDF measurement tools
Most CAD viewing software and many PDF viewers include measurement tools. Set the scale using a known dimension on the drawing — calibrate once — and then click to measure any length or area. This is much faster than manual scaling and directly eliminates the printed-scale error, because you're working in the original digital file.
AI-powered floor plan tools
RenoCalc is built specifically for this. Upload a floor plan — whether it's an architect's drawing or an estate agent floor plan from a listing — and the floor plan cost estimator reads the rooms, extracts dimensions and generates a full renovation cost estimate in minutes. What would take a builder an hour of careful manual take-off is done automatically, with each room's area, perimeter and material quantities calculated from the plan. Try it with your next floor plan before you next visit site.
Estate agent floor plans
Estate agent and Rightmove floor plans are often prepared for marketing, not construction. They may show approximate dimensions only, omit wall thicknesses, or round measurements to the nearest 0.1m. They're useful for a rough first estimate when assessing a property, but always verify critical dimensions on site before ordering materials or committing to a fixed price. The Rightmove floor plan renovation cost guide covers how to use these plans at the appraisal stage without being caught out by their limitations.
Floor plan measurement is a skill that rewards method and consistency. Use annotated dimensions where they exist, verify scale before you measure, record every room systematically and always deduct openings. Once you've got the take-off right, the material calculations that flow from it are straightforward. Get it wrong at the measurement stage and every subsequent number in your quote will be off.
If you want to skip the manual take-off entirely, RenoCalc can generate full renovation costs directly from your floor plan — measuring every room automatically and turning those dimensions into a complete material and labour schedule. For builders who are regularly pricing from drawings, that's a significant time saving on every quote.